If you want to use DIDww.com to make calls, then you need an outbound SIP Trunk. So create VoiceOut trunk.
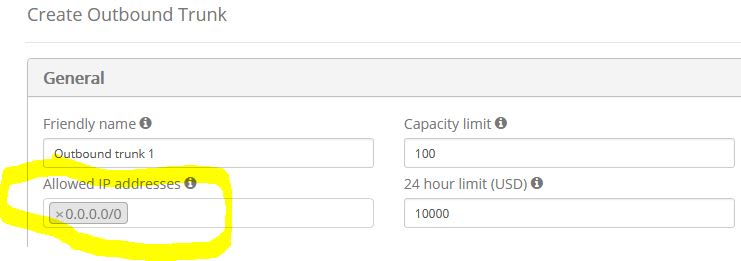
Friendly name: Whatever you want to call it.
Allowed IP address: Your public IP address
Optional
Destination Dialling Mode: Reject All
Exceptions: the area codes you allow calls to be places to. For me, I only allow calls to placed within Canada, so I have the following.
1403,1587,1780,1825,1236,1250,1604,1672,1778,1204,1431,1506,1709,1782,1902,1226,1249,1289,1343,1365,1416,1437,1519,1548,1613,1647,1705,1807,1905,367,1418,1438,1450,1514,1579,1581,1819,1306,1639,1876
Leave the rest of the settings default.
Now on the IP Office.
Create a new sip line.
1. ITSP Domain Name : out.didww.com
2. ITSP Proxy Address: 46.19.210.19
3 Layer 4 Protocol: UDP
4 Send Port 5060
5. Username and Authentication are Both the username of the sip trunk.<-from didww
6. Password: the Password of the sip trunk. <-from did
7. Create SIP URI: Yes
8. Incoming Group ID : Give it line number. 9 for example.
9. Outgoing ID: Same as incoming group ID.
10. Save/Update.
11. Go back and edit the sip line you just created.
12. Credentials: Click drop down and select the username you used in Step 5.
13. Advanced
14. Call Details
15. Edit the URI
16. Set Use Internal Data both Display and Content for Local URI, Contact P Asserted ID, P Preferred ID.
Save.
Open up SSA and click on trunks. Select the trunk number you specified in step 8, click the register tab and verify the trunk is registered.
Back on the IP Office go to Settings/Alternate Route Selection, and edit the ARS table to use the line group you created.
Make a test call.